Testing Orc Skin: Contrast vs Acrylics
Stas dropped by our favourite local hobby shop and came back with exactly the kind of haul that immediately leads to experiments: a few paints, some grass tufts, a drill bit and tweezers. Naturally, that meant it was time to test some ork skin.
This time the idea was simple: compare two approaches side by side and see what actually feels good on the miniature. Not just what is supposed to be faster or more efficient, but what gives an effect we actually enjoy looking at.
First try: contrast paint
The first test was ork skin done with contrast paint alone. The result was… not quite it.
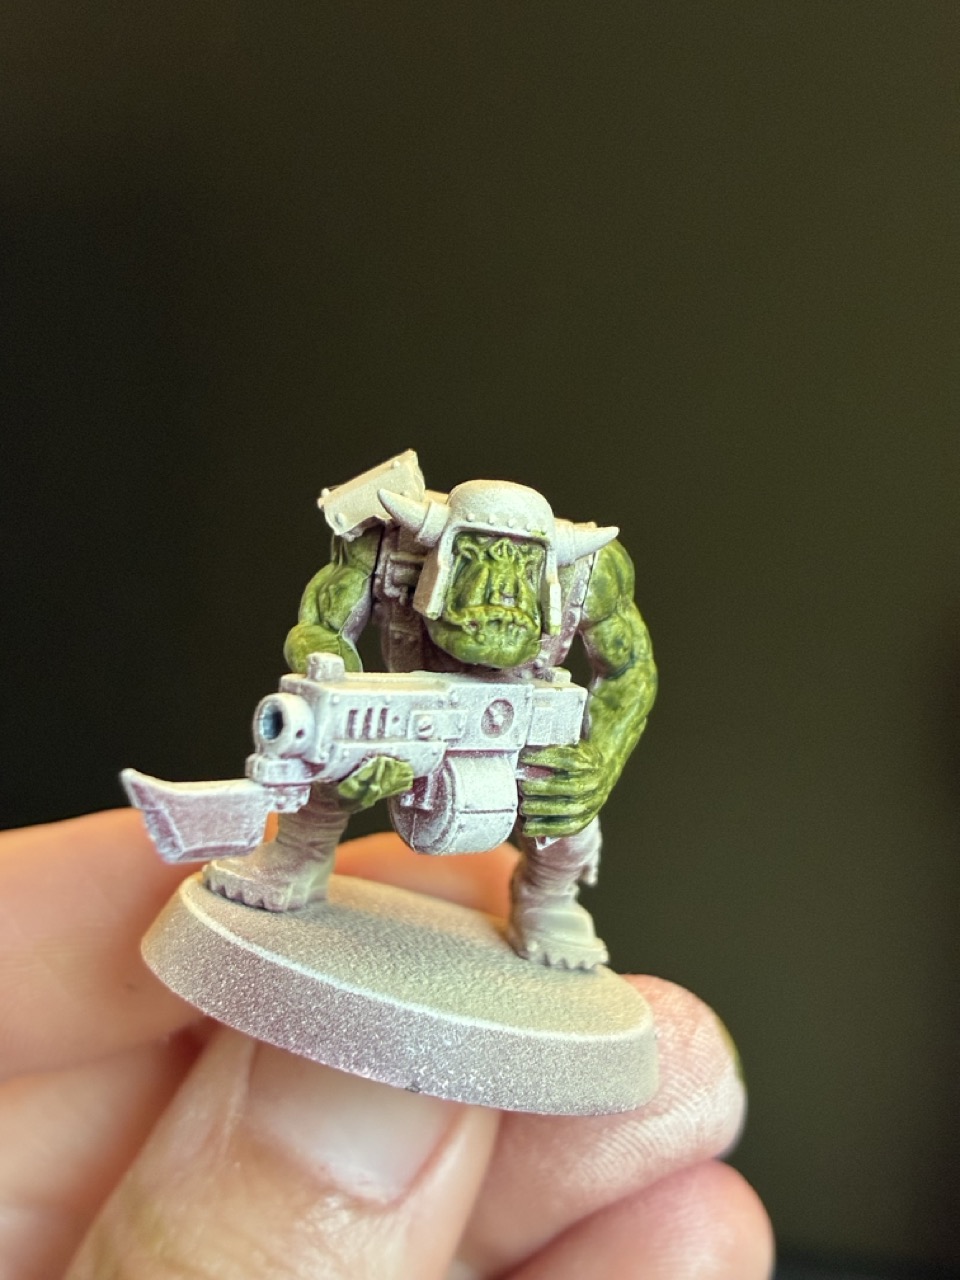
It wasn’t a disaster by any means, but it just didn’t really click. The zenithal underpainting was still showing through quite strongly, so the model already had some brightness and variation, but the overall finish didn’t fully land for Stas.
Then came the next step: adding a shade that had originally been bought with the acrylic workflow in mind.
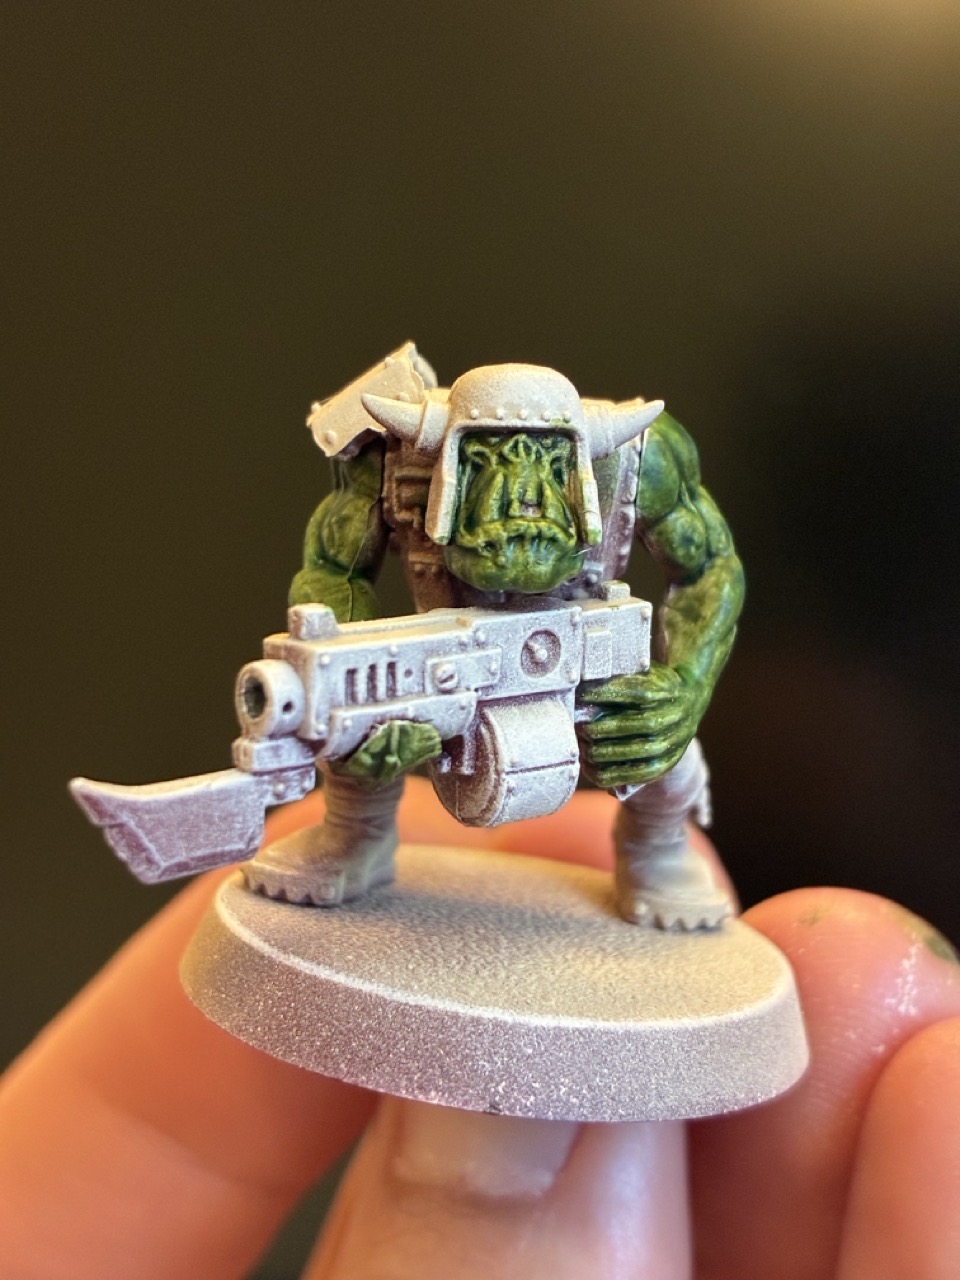
And that helped a lot. The extra shading tied things together much better and gave the skin a result that felt more convincing.
Second try: classic acrylic route
Then Stas switched to a more traditional method, starting with a base colour.
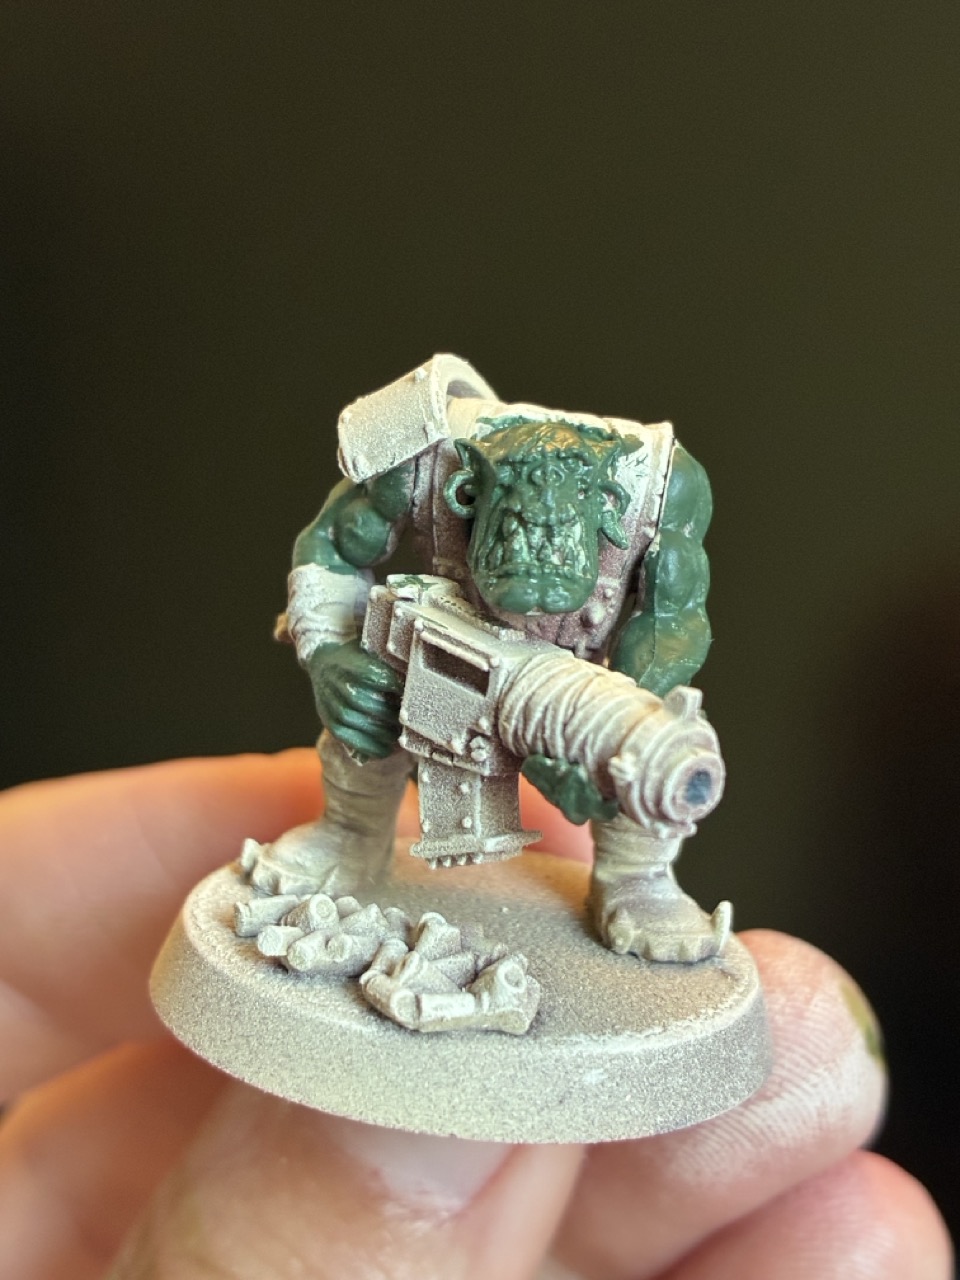
At this stage, in his own words, the ork looked a bit like one of those cheap toy soldiers bought in packs of 100. Which, honestly, is a very relatable phase of painting.
Next came the shade, which immediately did what shades are supposed to do: fill the recesses and make everything start looking like an actual miniature again.

And finally, there was the dangerous moment we all know: the sudden belief that maybe, just maybe, we are capable of proper highlighting. So Stas added some manual highlights with a layer paint.
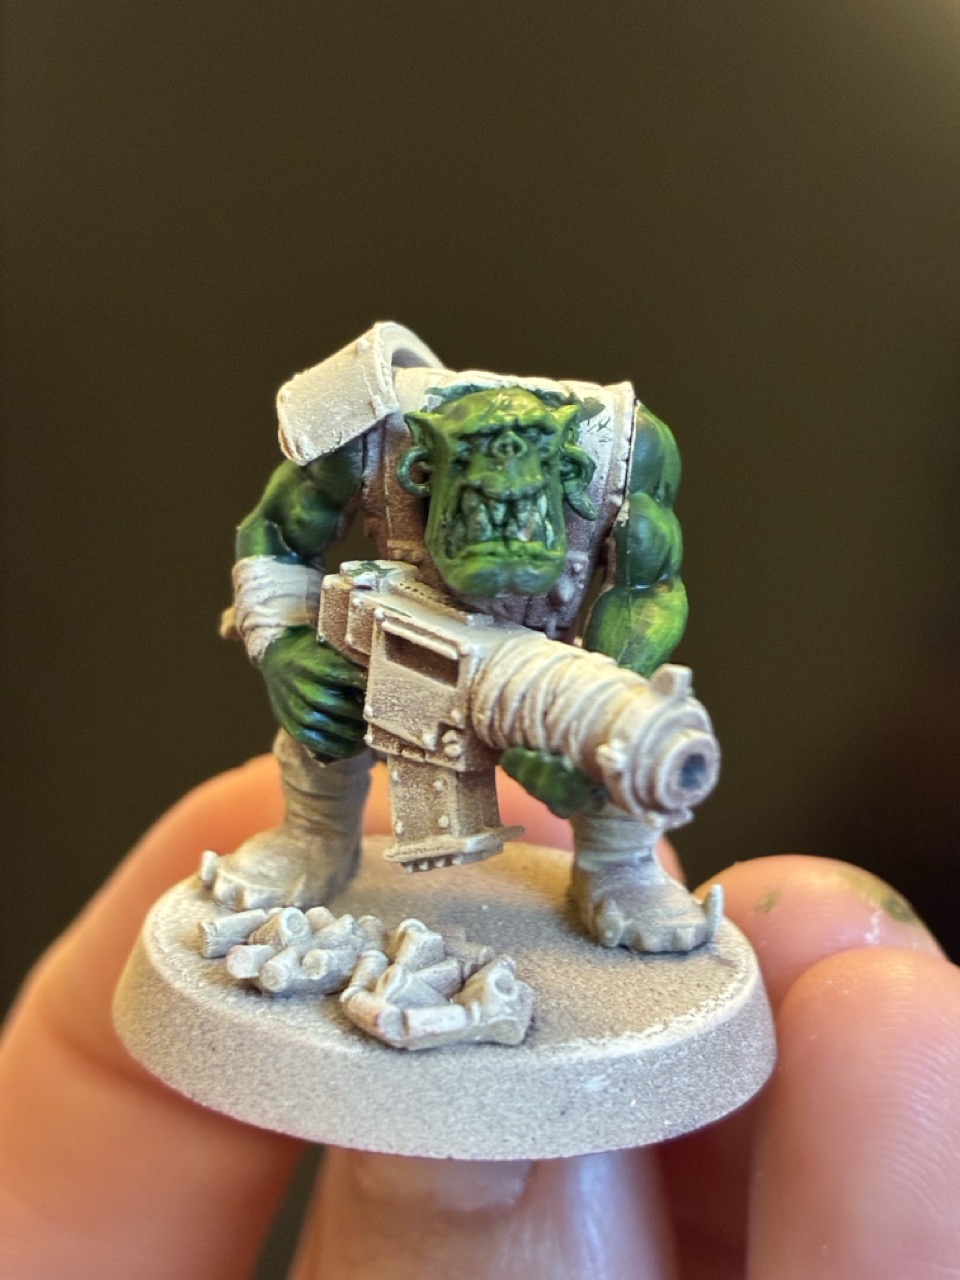
And you know what? It worked. More importantly, the whole process turned out to be genuinely fun.
Current verdict
Right now the acrylic route seems to be the winner, not only because of the final effect, but because the process itself was satisfying. That matters a lot. If a painting method is enjoyable, we’re much more likely to keep going with it instead of endlessly looking for shortcuts.
So the plan is to paint a few more ork skins using that second method and see if it keeps delivering.
There was also a good follow-up question from Michał: what about adding highlights on top of the contrast version as well? That still feels worth testing. Since the zenithal is already coming through and the skin is fairly bright, it may or may not need it — but that’s exactly the kind of thing that’s best checked on an actual model instead of debated in theory.
Hobby side quest: magnification
As often happens, one painting discussion immediately opened the door to another hobby tool topic: magnification. Stas asked whether any of us had magnifying glasses with built-in light. Michał has a desk magnifier, although apparently the exact magnification remains a mystery.
A perfectly normal hobby conversation, in other words.
What we like about this kind of test
We really enjoy these small, low-stakes paint experiments. One miniature part, two approaches, quick conclusions. No need to overcomplicate it. Sometimes a short test tells us more than a dozen tutorials.
And in this case the takeaway is simple: shade does a lot of heavy lifting, highlights are scary until they suddenly aren’t, and ork skin gives plenty of room to experiment.
If Stas follows up with more tests — especially contrast plus highlights — we’ll definitely want to compare the results.